Can You Smooth Textured Walls Without Replacing the Drywall?
Yes, you can often smooth textured walls without replacing the drywall. Skim coating applies thin layers of joint compound or plaster over the existing surface to create a flatter, more even base for paint. It works well when the drywall remains solid but has an outdated texture, uneven patches, old wallpaper damage, or years of accumulated surface flaws.
At Cascade Painting & Restoration, we provide skim coating services for walls and ceilings throughout the Portland metro area. Before recommending it, we look at the existing texture, drywall condition, previous coatings, moisture history, and the finish you want. Some walls need a full skim coat, while others only need targeted repairs and careful preparation.
How to Smooth Textured Walls Without Replacing Drywall
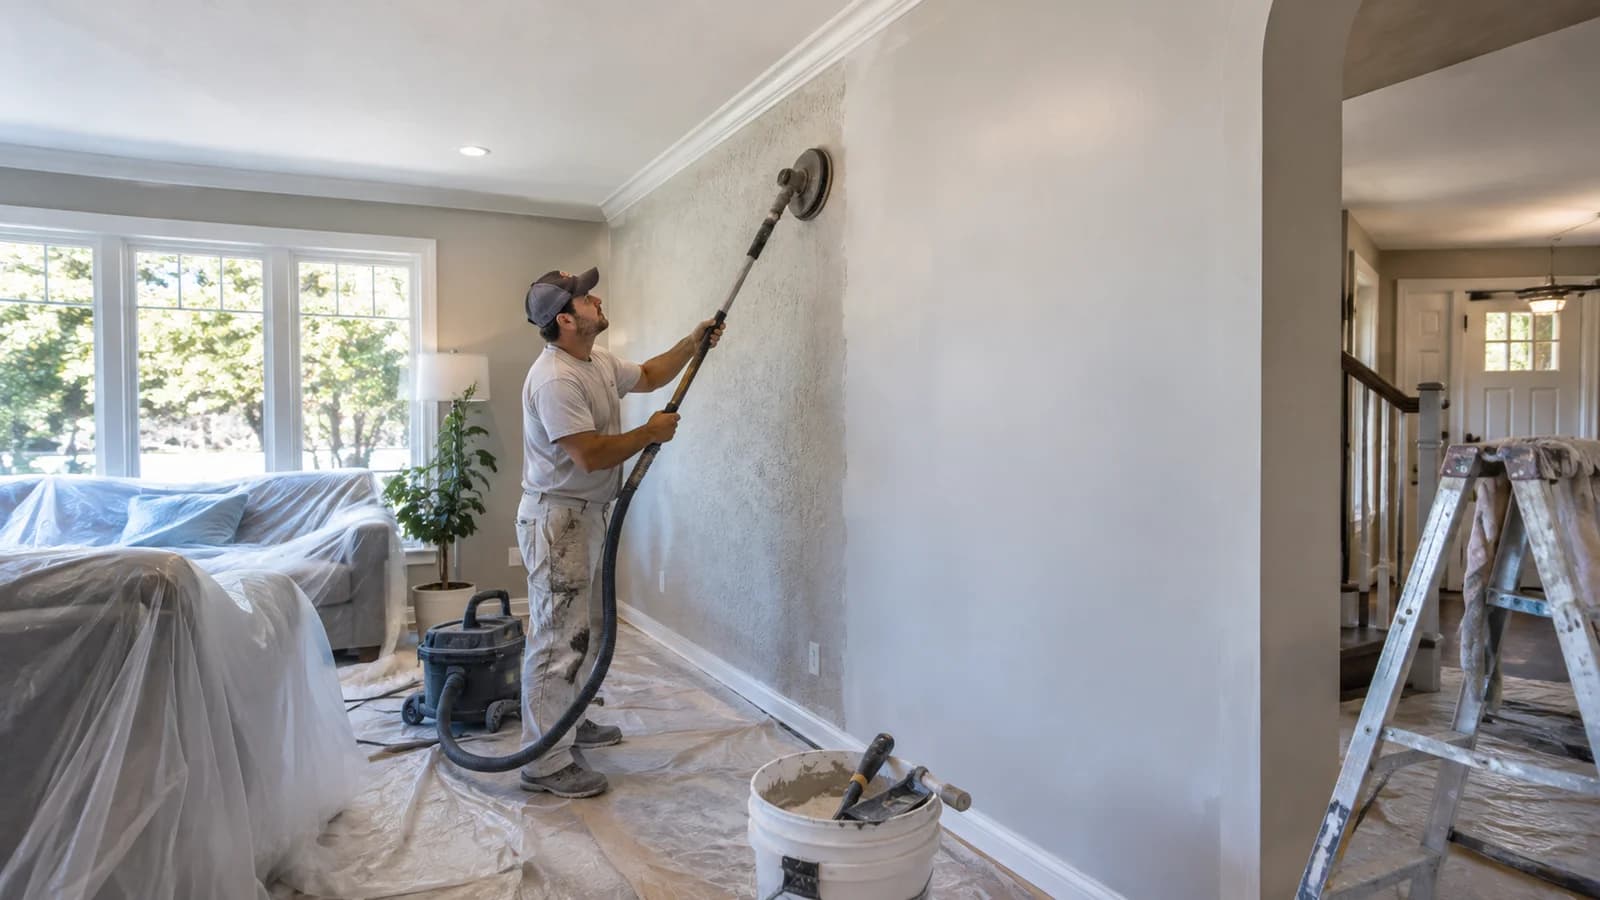
Skim coating covers the existing surface with one or more controlled layers of compound. Each coat fills low areas and reduces the raised pattern left by orange peel, knockdown, heavy roller texture, old patches, or repeated paint applications.
The basic process usually includes:
- Inspecting the drywall and identifying damage
- Cleaning the walls and removing loose material
- Repairing cracks, holes, and unstable sections
- Preparing glossy or previously painted surfaces
- Applying thin coats of joint compound
- Sanding between coats as needed
- Checking the walls under direct lighting
- Priming the finished surface
- Applying the selected interior paint
The number of coats depends on the texture. A light orange-peel finish may need less buildup than a deep knockdown pattern. Heavy texture requires more material and labor because the compound must fill the low areas without creating ridges or waves.
Rushing the process usually leaves visible trowel marks, uneven sections, or sanding scratches. Thin, consistent coats produce a better surface than one overly thick application.
When Skim Coating Makes Sense
Skim coating works best when the drywall remains structurally sound. The wall may look dated or uneven, but it should still feel firm and secure.
Common reasons to skim coat include:
- Covering unwanted wall texture
- Smoothing repairs that don’t match the surrounding surface
- Correcting damage left after wallpaper removal
- Refinishing walls with layers of old paint
- Preparing a room for a lower-sheen or more modern finish
- Smoothing ceilings after texture removal
- Creating a consistent surface across old and new drywall
Older Portland homes often contain a mix of plaster, drywall, remodeled sections, and previous repairs. One room may have several textures or patching styles from work completed decades apart. A full skim coat creates a consistent surface without removing every sound wall panel.
Skim coating also makes sense when spot repairs would cover much of the wall anyway. Once imperfections spread across a large area, treating each one separately may leave an inconsistent finish.
When the Drywall Still Needs Repair or Replacement
Skim coating improves the surface, but it doesn’t correct structural or moisture-related problems. Soft drywall, active water damage, mold, loose panels, or severe cracking require attention before anyone applies a finish coat.
Press gently around damaged areas. Drywall that feels soft, swollen, or crumbly may have absorbed moisture. Brown stains, peeling paint, bubbling surfaces, and musty odors also deserve investigation.
Fix the source of the moisture before repairing the wall. Painting or skim coating over an active leak traps the evidence without stopping the damage.
Our drywall repair services cover holes, cracks, water-damaged sections, ceiling damage, and texture matching. A small damaged section may need replacement even when the rest of the room qualifies for skim coating.
Movement also matters. A crack that repeatedly returns near a door, window, ceiling joint, or stairwell may signal settling or another underlying issue. Filling it without understanding the cause can lead to another visible crack later.
Should You Remove the Texture First?
You don’t always need to remove wall texture before skim coating. In many cases, covering a clean, stable texture creates less mess and avoids unnecessary damage to the drywall paper.
Loose, peeling, or poorly bonded material must come off. High ridges may also need scraping or sanding so they don’t interfere with the new surface. The goal is to create a firm base that accepts the compound evenly.
Painted texture requires closer inspection. Glossy coatings may need cleaning and dulling before the skim coat goes on. Grease, smoke residue, dust, and household cleaners can also weaken adhesion if they remain on the wall.
Texture removal makes more sense when the existing material has started releasing from the drywall or when heavy peaks would require excessive buildup. An on-site inspection will show whether covering or removing it is the more practical approach.
Older Walls May Require Safety Testing
Before sanding, scraping, or disturbing painted texture in an older home, determine whether lead-based paint precautions apply. Homes built before 1978 may contain lead paint beneath newer coatings.
The Oregon Health Authority’s lead-based paint guidance explains the state’s Renovation, Repair and Painting requirements. Work that disturbs older painted surfaces may require lead-safe containment, work practices, and cleanup.
Certain older textures and building materials may raise other testing questions as well. Don’t assume a coating or texture is safe to grind or sand based on appearance alone. Confirm the age of the home and discuss testing before creating dust.
This step matters because smoothing walls involves direct contact with the existing finish. A standard dust mask and an open window don’t replace the proper procedures for regulated materials.
Why Painting Over Texture Won’t Make It Smooth
Paint changes color and sheen, but it follows the shape underneath. Several coats of paint won’t fill deep texture or flatten raised patterns.
Thicker paint may soften the appearance slightly, but the texture will remain visible, especially under side lighting. Repeated coats can also build up around edges and make future preparation harder.
If you want truly smooth walls, the surface needs leveling before the finish paint goes on. That usually means skim coating, sanding, repairing, and priming rather than relying on paint to conceal the pattern.
Paint sheen affects the result too. Satin and higher-sheen finishes reflect more light and tend to reveal unevenness. Flat paint disguises minor flaws better, but it won’t hide a textured wall.
Skim Coating Versus Installing New Drywall
Replacing drywall involves removing the existing panels, disposing of the debris, installing new sheets, finishing the seams, sanding, priming, and painting. It makes sense when the drywall has widespread moisture damage, severe deterioration, or other problems that leave it unsuitable as a base.
Skim coating preserves sound drywall and focuses on the visible surface. This usually creates less demolition and avoids disturbing trim, electrical boxes, flooring, and adjoining finishes as extensively.
Still, skim coating isn’t automatically the right choice for every room. Very heavy texture, failing drywall, widespread loose material, or complicated wall conditions can change the amount of labor involved.
A useful estimate should compare the condition of the existing wall with the work required to create the desired finish. The cheapest-looking option at the start may not deliver a paint-ready surface.
How Smooth Should the Walls Be?
“Smooth” can mean different things. Some homeowners want a clean surface that looks even under normal room lighting. Others expect a highly refined finish that stays uniform under large windows, wall-washing lights, or dark satin paint.
Lighting has a major effect on how the wall looks. Light shining directly across a surface reveals shallow ridges and sanding marks that overhead lighting may hide. Long hallways, stairwells, and rooms with large side windows deserve careful inspection.
Dark paint and higher sheen also expose surface variation. If your design includes either one, tell the painter before the skim-coating work begins. The desired paint finish affects how precisely the wall needs preparation.
Inspecting a sample area can clarify expectations. A test section shows how much of the old texture remains visible and how the finished wall responds to the room’s lighting.
What Happens After the Skim Coat Dries?
Once the final layer dries, the wall needs sanding and a detailed inspection. Painters may use work lights from several angles to locate ridges, pinholes, rough edges, or shallow low spots.
Dust removal comes next. Fine sanding residue must come off the surface before primer goes on. Skipping this step can interfere with adhesion or leave a gritty finish.
Primer seals the porous joint compound and creates a more even base for paint. Without primer, repaired and skim-coated areas may absorb finish paint differently, causing dull or uneven patches.
After the primer dries, the walls receive their finish coats. Our interior painting services include surface protection, preparation, walls, ceilings, trim, doors, and cabinets. Handling the skim coat and painting as one coordinated project keeps the finished surface consistent.
Plan for Dust and Room Access
Skim coating involves wet compound, drying time, sanding, and cleanup. Furniture and personal items should move away from the walls before work begins. Floors, fixtures, vents, and remaining furniture need thorough protection.
The room may also require several work periods because each layer needs time to dry before sanding or receiving another coat. Temperature, humidity, compound thickness, and the condition of the wall affect drying.
Discuss which rooms need to remain accessible during the project. For larger jobs, working in sections may keep other parts of the home usable.
Our guide on preparing your home before professional painters arrive explains what to move, how to clear access, and which project details to confirm before work starts.
Start With the Condition of the Existing Wall
You can smooth textured walls without replacing drywall when the existing panels remain dry, firm, and securely attached. Skim coating covers unwanted texture and widespread surface flaws while preserving the wall underneath.
Damaged sections still need proper repair, and older painted surfaces may require testing before sanding or scraping. The texture depth, wall condition, lighting, and desired paint sheen determine how much preparation the room needs.
At Cascade Painting & Restoration, we inspect the walls before recommending spot repair, full skim coating, or drywall replacement. To discuss textured walls in your Portland-area home and request a free estimate, contact our team.
Recent Blogs
september 15, 2026
How Often Should You Repaint Interior Walls in a Portland Home?
august 3, 2026
Painting an Older Portland Home: What Should Be Checked First?
july 20, 2026
Drywall Repair Before Painting: Why Smooth Walls Matter
july 14, 2026
How to Prepare Your Home Before Professional Painters Arrive
july 8, 2026
Exterior Painting in Portland: Why Prep Work Matters in a Wet Climate
Contact Information
Reach out to us for a free estimate. We're here to help with all your painting needs.
- Call At:(503) 936-3255
- Email Us At:cascadepaintandres@gmail.com
- Hours:Mon–Sun 8 AM – 6 PM
- Serving:Portland Metro Area