Should You Paint Kitchen Cabinets Before or After Repainting the Walls?
In most kitchen projects, you should paint kitchen cabinets before repainting the walls. Cabinet work requires extensive cleaning, sanding, priming, spraying or brushing, and masking. Completing that work first keeps cabinet dust and overspray away from freshly finished walls. Once the cabinets have cured and the protective materials come down, the walls can receive their final coat and clean cut lines.
At Cascade Painting & Restoration, we paint walls, ceilings, trim, doors, and cabinets as part of our interior painting services. The exact order depends on the kitchen’s condition and the scope of the project, but cabinets first and walls second usually produces the cleanest, most efficient result.
Why Cabinets Usually Come Before Walls
Cabinet painting involves more preparation than wall painting. Kitchen cabinets collect cooking grease, fingerprints, cleaning residue, and airborne dust. Painters need to remove those contaminants before sanding or applying primer.
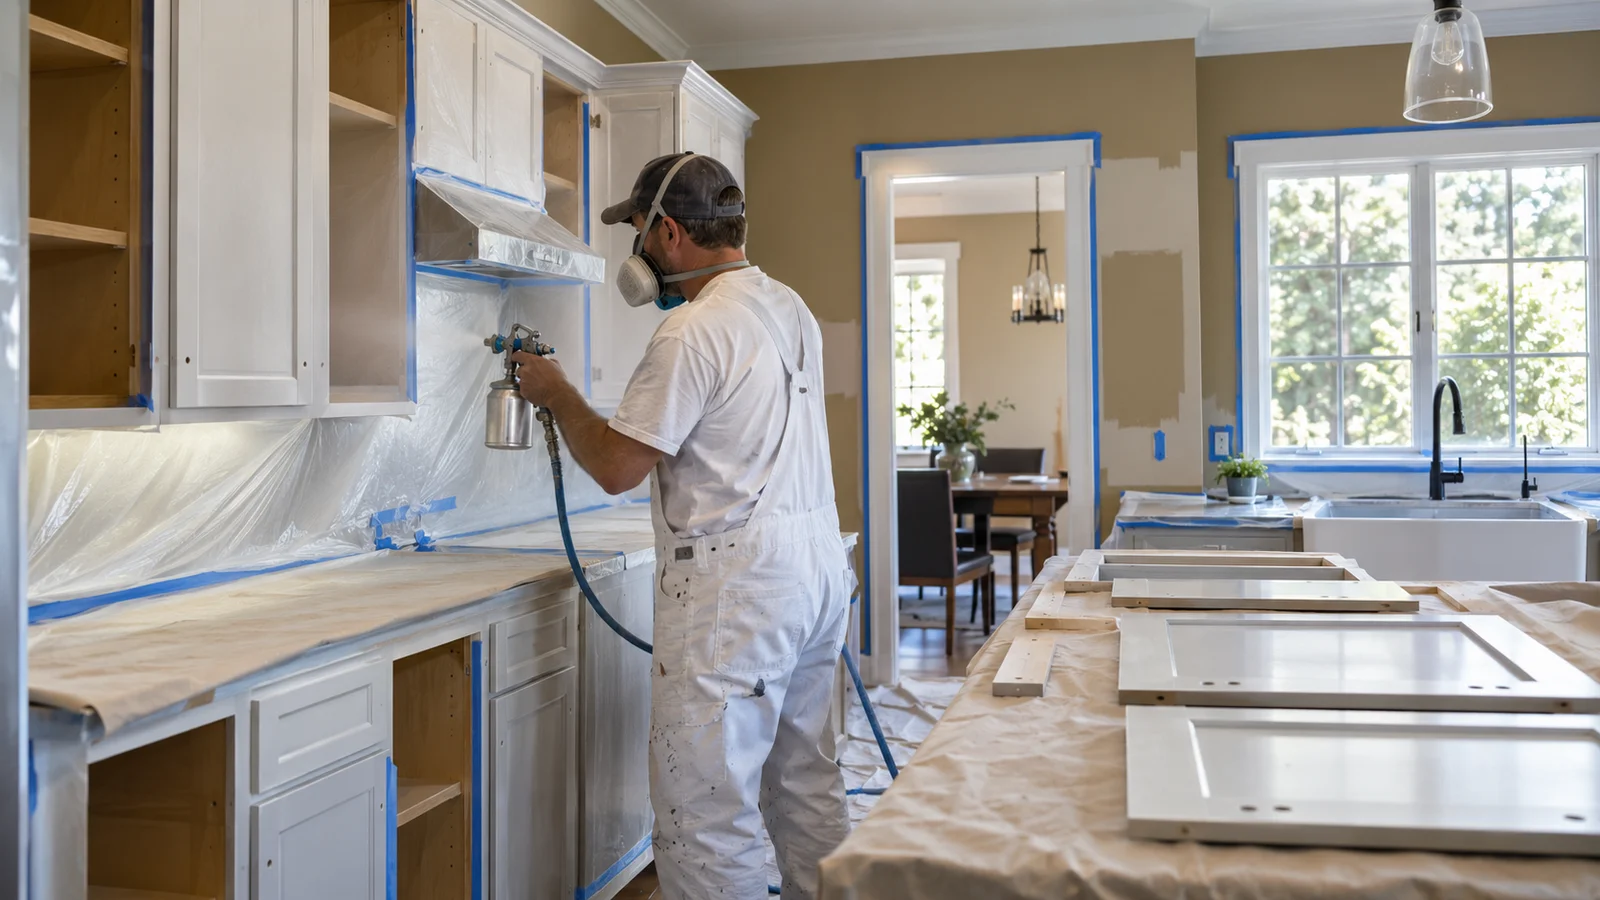
Doors and drawer fronts also need to come off so painters can reach the edges and cabinet frames. Hardware gets removed or protected. Counters, floors, appliances, backsplashes, and adjoining rooms may need masking, especially if the painter sprays the cabinet finish.
That work creates far more activity around the room than rolling paint onto a wall. Sanding dust can settle on nearby surfaces. Tape may pull at a fresh wall coating. Ladders, hoses, drying racks, and protective coverings increase the chance of scuffs.
By completing the cabinets first, the painter can focus on preparation and application without treating the new wall finish as a delicate surface. Wall paint then becomes one of the final steps that brings the kitchen together.
The Best Order for Painting Kitchen Cabinets and Walls
A typical kitchen repaint follows this general order:
- Confirm the cabinet, wall, ceiling, and trim colors.
- Remove cabinet doors, drawer fronts, hardware, and loose kitchen items.
- Repair damaged drywall, trim, or cabinet surfaces.
- Paint the ceiling if it’s included in the project.
- Clean, sand, prime, and paint the cabinets.
- Allow the cabinet coating to dry and cure as required.
- Reinstall or protect the finished cabinet components.
- Prepare, prime, and paint the walls.
- Complete final touch-ups and reinstall hardware.
The details may shift from one kitchen to another. For example, a painter might complete major wall repairs before cabinet painting but wait to apply the final wall coats until the cabinets are done.
This approach keeps drywall dust out of the cabinet finish while still protecting the finished walls from the most involved parts of cabinet preparation.
Complete Repairs Before Either Surface Gets Its Finish Coat
Painting order matters, but surface condition matters even more. Repair work should happen before the final cabinet or wall coatings go on.
Look for nail holes, damaged drywall, water stains, peeling caulk, cracked corners, or gaps where cabinets meet the walls. Old plumbing leaks and moisture near sinks also deserve attention before anyone seals the area with paint.
Paint won’t flatten a rough patch or stop an active leak. It follows the surface beneath it, which means dents and uneven repairs often become more noticeable once the fresh coating dries. Our team handles drywall repair when walls need patching, sanding, or texture matching before painting.
Cabinets need their own inspection. Loose hinges, damaged doors, deep scratches, failing coatings, and grease buildup can affect the finished result. Resolve those issues during preparation instead of trying to conceal them with another coat.
Should the Ceiling Come Before the Cabinets?
If the ceiling needs paint, it usually belongs near the beginning of the project. Ceiling paint can drip or spatter onto walls, cabinets, and counters. Painting from the top down limits the amount of finished work that needs protection.
The painter may remove cabinet doors and protect the boxes before working overhead. Once the ceiling dries, cabinet preparation and painting can continue.
A ceiling in good condition may not need repainting at all. Still, review it during the estimate rather than making the decision after the rest of the kitchen looks new. An older, discolored ceiling often stands out against freshly painted cabinets and walls.
What If the Walls Are Already Painted?
You don’t need to repaint otherwise sound walls simply because you’re changing the cabinets. If the wall coating has cured and still looks good, a painter can mask and protect it during the cabinet work.
Expect at least a few touch-ups afterward. Removing tape, shifting equipment, and reinstalling doors may leave minor marks near cabinet edges. Keeping some labeled leftover wall paint makes those corrections easier.
Recently painted walls require more caution because paint needs time to cure. Dry paint may feel ready to touch while remaining vulnerable to tape, pressure, or abrasion. Ask the paint manufacturer or your painter how long the specific coating should cure before cabinet masking begins.
If you already know that both surfaces need paint, cabinets first remains the simpler sequence. It avoids spending time protecting an entire new wall finish during sanding and cabinet application.
What If You’re Only Painting the Walls?
For a walls-only project, the cabinets stay in place and receive careful protection. Painters mask the cabinet edges, cover counters and appliances, and create clean lines around the boxes.
Wall painting also gives you an opportunity to inspect the narrow areas beside cabinets, above upper cabinets, and behind movable appliances. Kitchens often show grease, stains, and old touch-ups in these spots.
A washable wall finish generally makes sense in a hardworking kitchen, but sheen selection should account for the wall’s condition. Higher-sheen coatings tolerate cleaning well, yet they tend to reveal dents, patch edges, and texture differences more readily. Smoother walls give you more flexibility.
Low-odor or low-VOC products may also reduce disruption during an occupied-home project. The U.S. Environmental Protection Agency’s guidance on volatile organic compounds explains why ventilation and product use matter for indoor air quality. Follow the coating label and keep fresh air moving when conditions allow.
Plan the Colors Together Even If the Painting Happens in Stages
Cabinet and wall colors influence each other, so choose them under the same kitchen lighting. Natural light, bulbs, counters, flooring, and backsplash materials can shift how a sample appears.
Place cabinet and wall samples next to the fixed materials rather than evaluating each color alone. Check them in the morning and evening. Portland’s gray winter light can make a color look cooler than it did under bright store lighting.
Sheen affects the relationship too. Cabinets usually need a durable coating that tolerates handling and cleaning, while wall sheen depends on washability and surface condition. Two colors that look similar on sample cards may separate noticeably once they appear in different finishes.
If the cabinets and walls will share the same color, test both products. The cabinet coating and wall paint may reflect light differently even when the color formula matches.
Avoid Treating Cabinet Paint Like Wall Paint
Cabinet doors receive constant contact around knobs, handles, and edges. They also face grease, steam, food splashes, and regular cleaning. A coating and preparation method that works on drywall may not perform the same way on cabinetry.
Proper cabinet preparation usually includes cleaning, dulling glossy surfaces, addressing damaged areas, applying a suitable primer when needed, and allowing enough drying time between coats. Rushing these steps can lead to poor adhesion or a finish that marks easily.
Reinstalling doors too soon may also cause freshly coated edges to stick or imprint. Drying and curing aren’t always the same. Follow the product requirements before returning the kitchen to normal use.
Keep the Kitchen Usable During the Project
A kitchen repaint affects daily routines, particularly when cabinet doors and drawers need removal. Clear counters before work begins and move food, utensils, countertop appliances, and other frequently used items away from the painting area.
Set up a temporary spot for coffee, snacks, and simple meals in another room. Discuss whether the refrigerator, sink, and major appliances will remain accessible. The answer may change during different stages of the job.
You should also ask how the crew will contain dust, ventilate the room, store cabinet doors, and protect adjoining spaces. Our guide on preparing your home before professional painters arrive covers the household details worth addressing before the first workday.

Choose the Sequence Before Work Begins
For most complete kitchen repaints, the practical answer is straightforward: paint the cabinets first, then finish the walls. Complete dirty repair work early, paint the ceiling before lower surfaces, and save final wall coats and touch-ups for the end.
A different sequence may make sense if the walls were recently painted, the cabinets will stay untouched, or another contractor needs access to the room. Decide the order during the walkthrough so the estimate, protection plan, and schedule all reflect the same scope.
Cascade Painting & Restoration handles cabinet, wall, ceiling, door, and trim painting for homes across the Portland metro area. To plan the right sequence for your kitchen and request a free estimate, contact our team.
Recent Blogs
september 21, 2026
Flat, Eggshell, or Satin: Which Paint Finish Is Best for High-Traffic Rooms?
september 20, 2026
Can You Smooth Textured Walls Without Replacing the Drywall?
september 15, 2026
How Often Should You Repaint Interior Walls in a Portland Home?
august 3, 2026
Painting an Older Portland Home: What Should Be Checked First?
july 20, 2026
Drywall Repair Before Painting: Why Smooth Walls Matter
Contact Information
Reach out to us for a free estimate. We're here to help with all your painting needs.
- Call At:(503) 936-3255
- Email Us At:cascadepaintandres@gmail.com
- Hours:Mon–Sun 8 AM – 6 PM
- Serving:Portland Metro Area